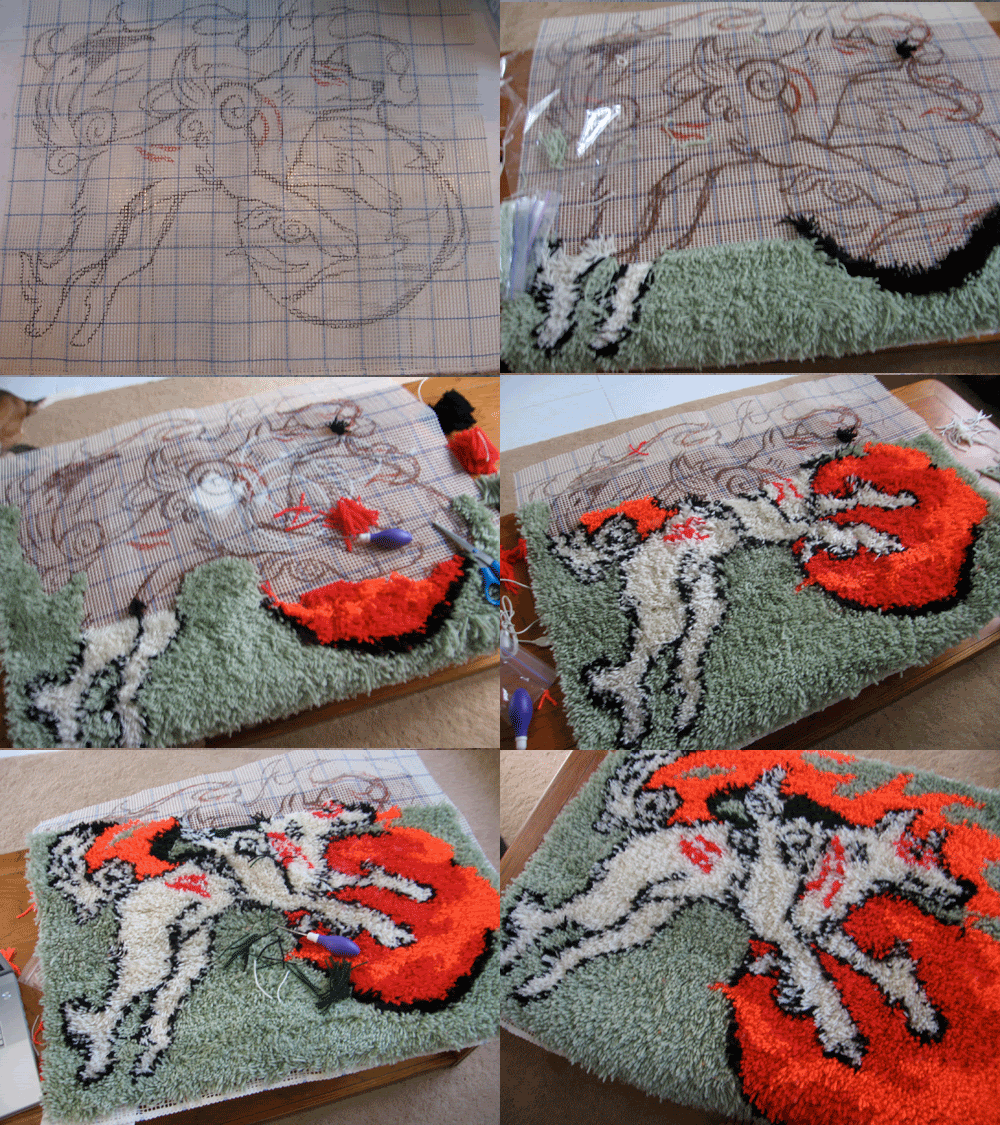
 This rug was created as a birthday present for my great friend and college room mate who just adores the game. If you haven't heard about it, you should check it out. It's a game with unique style and a lot of charm. The rug is about 21/2' long and 3' wide. I really wanted to make her an Okami carpet for her new room in our on campus apartment and this was the cheapest way I could find. The total cost of the project was around 25 dollars. It really is simple, but time consuming. I rushed to get it done in time for the start of the school year (done in about two weeks), so the process was not as enjoyable as it could have been. I also ran out of orange yarn near the end, so I had to go back to store. I bought the wrong shade of orange and had to go back again. That was fun. Any who...
Here's what I used to make it:
- Blank latch hook canvas (purchased at a local craft store for 10 bucks and cut down to the desired size)
- Permanent marker(s)
- Latch Hook
- Scissors
- clear thread
- Wool 0r Acrylic Yarn of need colors cut down to lengths of 2"
- Cardboard for rolling and cutting yarn
- Rubber cement
- Scotch guard
So to start I drew out on my design onto the canvas using black and red sharpies. Make sure you put it down on a white surface that you can clean. I used my tile floor and cleaned it off with that Mr. Clean Magic Eraser (that thing works wonders). Also leave about an inch boarder from each side to fold under later.
Now to the latch hooking.
Here's a video on how to do it. I had to have someone show me how to do it. I couldn't figure it out with just the picture directions. So if you need a visual demonstration here you are.
Repeat, A LOT.
Here's a gif of my progress:

I took a picture about every day (missed a coulpe though).
When you are finished latch hooking, you want to flip it over and use the rubber cement to seal up the back as best as you can. Make sure you do this in a well ventilated area.
Fold the bare canvas sides in and sew them down using thread.
Now you even out the yarn in the front using scissors.
Last, spray it with scotch guard to help protect it from getting dirty.

You should be warned that this type of rug is decorative, it will get trashed pretty easily. So treat your new custom rug with great care. If don't want to risk ruining it, you could use it as a wall hanging instead.
Everything's HunkyDorky,
Sponzar


No comments:
Post a Comment